
How to Turn Frozen Pizza Crust Dough Into a Crispy, Cheesy Masterpiece
Let’s be honest — we all have that one frozen pizza crust sitting in the freezer, waiting for its moment to shine. Maybe you bought it for a quick dinner. Maybe you thought you’d make “homemade pizza night” happen last Friday… and it didn’t. Either way, that little frozen dough ball can become something amazing — if we treat it right.
Today, we’re diving into how to use frozen pizza crust dough like a pro. From thawing it properly to baking it golden brown, we’ll walk through every step to make sure our pizza tastes fresh from an Italian pizzeria, not like a rushed freezer meal.
Step 1: The Art of Thawing Frozen Dough
Here’s the thing — if we skip the thawing step, the dough will fight back. It’ll be stiff, uneven, and tear when we try to stretch it. So let’s start right.
Option 1: Slow Thaw in the Fridge (Recommended)
This is the best way to go. Take the dough out of the freezer the night before and place it in a lightly oiled bowl. Cover it with plastic wrap and let it thaw overnight in the fridge. By morning, it’ll be soft, stretchy, and ready to rise again.
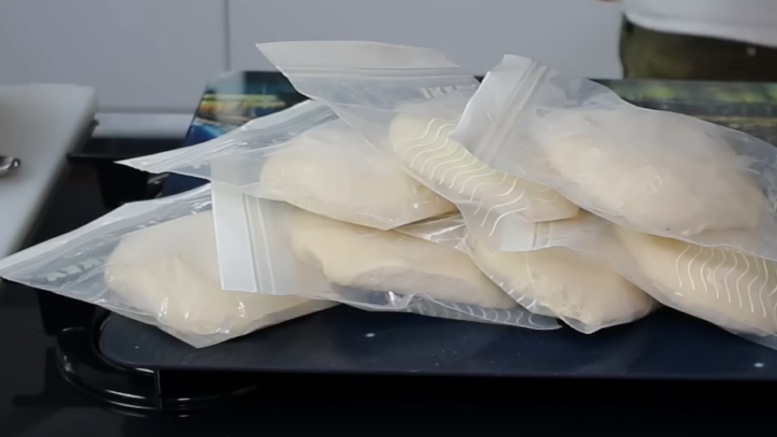
Option 2: Quick Thaw on the Counter
If we forgot to plan ahead (and let’s be real — we often do), place the frozen dough in a sealed plastic bag and set it in a bowl of room temperature water. In about an hour or two, it’ll be ready. Just don’t use hot water — it’ll start cooking the dough, and we’ll end up with a gummy mess.
Pro tip: Once thawed, always let the dough rest for 20–30 minutes at room temperature before shaping. It makes a huge difference in how easily it stretches.
Step 2: Prep the Dough Like a Pizzeria Pro
Now that we’ve got our soft, pliable dough, it’s time to prepare it for greatness.
- Lightly dust the countertop with flour.
- Coat your hands with olive oil (trust me, it keeps things from sticking).
- Press the dough from the center out, gently forming a circle or rectangle — depending on your baking pan.
Avoid using a rolling pin unless absolutely necessary. Stretching the dough by hand keeps those beautiful air bubbles that give us a light, fluffy crust.
Highlight this: If the dough keeps shrinking back, it’s just too cold — let it rest another 10 minutes.
Step 3: Pre-Bake for the Perfect Crust
This step is a total game changer. Most people skip it — and then wonder why their crust is soggy.
Here’s the trick: pre-bake your crust before adding toppings.
- Preheat the oven to 475°F (245°C).
- Place the stretched dough on a parchment-lined pan or a preheated pizza stone.
- Bake for 5–7 minutes, just until it starts to firm up and get light golden spots.
When it comes out, it’ll smell amazing already — and that’s when we move on to the fun part.
Step 4: Sauce, Cheese, and All the Toppings
Now we’re in the creative zone. This is where we can get playful. The beauty of frozen dough is that it’s a blank canvas — it works with whatever we have in the fridge.
A Few Classic Combos:
- Margherita: tomato sauce, mozzarella, basil, and a drizzle of olive oil.
- Meat Lover’s: sausage, pepperoni, bacon, and mozzarella.
- Veggie Supreme: mushrooms, spinach, peppers, red onion, and feta.
- BBQ Chicken: barbecue sauce, grilled chicken, red onion, and smoked gouda.
Whatever we choose, make sure to leave a 1-inch border around the edges — this gives the crust room to puff up beautifully.
And remember: less is more. Overloading the toppings can weigh down the dough and prevent it from baking evenly.
Pro tip: sprinkle a little cheese under the sauce for an extra flavor layer — it keeps the crust from getting soggy!
Step 5: Bake It Like a Boss
We’ve done all the prep. Now it’s time to bake!
Crank that oven up again to 475°F (245°C) — or even 500°F (260°C) if our oven allows it. The hotter, the better. That’s how pizzerias get that crispy, chewy texture.
Bake the pizza on the lowest rack for about 10–12 minutes, or until the crust turns golden brown and the cheese is bubbling.
If we’re using a pizza stone, it might bake even faster, so keep an eye on it after the 8-minute mark.
When it’s done, resist the urge to cut it immediately. Let it rest for a couple of minutes — this helps the cheese settle and keeps it from sliding off when slicing.
Step 6: Flavor Boosts You’ll Love
This is the part where a frozen pizza crust transforms into something truly gourmet.
Here are some of my favorite finishing touches:
- Garlic butter glaze: Mix melted butter with minced garlic and brush it on the crust edges after baking.
- Fresh herbs: Sprinkle fresh basil, oregano, or arugula on top before serving.
- Parmesan rain: A quick shower of grated Parmesan right out of the oven adds a beautiful nutty flavor.
- Spicy oil: Drizzle chili-infused olive oil for a little heat.
Small touches like these make the pizza taste like it came straight out of a wood-fired oven.
Bonus Tip: Make Extra for Later
If we’re already taking the time to thaw and bake one pizza, why not double it up?
Frozen pizza dough is great for meal prepping. After shaping, we can parbake and freeze our own crusts — just like store-bought ones, but fresher and cheaper.
- Roll out the dough.
- Bake it for 5 minutes.
- Let it cool, then wrap it tightly in plastic and foil.
Next time we’re craving pizza, all we have to do is pull one out, top it, and bake — no thawing required. It’s the ultimate weeknight hack.
Troubleshooting Common Frozen Dough Problems
Even with the best intentions, things can go sideways. Here’s how we can fix them:
| Problem | Likely Cause | Quick Fix |
|---|---|---|
| Dough too sticky | Not enough flour or too warm | Dust with flour, chill briefly |
| Dough tearing when stretched | Too cold or not rested | Let it sit 10–15 min at room temp |
| Crust too dense | Didn’t rise enough | Next time, let it rest longer before baking |
| Soggy center | No pre-bake | Always pre-bake your crust! |
| Pale crust | Oven too cool | Crank the heat to at least 475°F |
We’ve all been there — and the best part is, every “mistake” still tastes pretty good.
Why Frozen Pizza Dough Is Totally Worth It
Let’s end on a high note: frozen pizza dough is one of the most underrated freezer staples.
It’s cheap, versatile, and incredibly forgiving. Plus, it lets us create real homemade pizza flavor without kneading, proofing, and cleaning up flour for days.
We can use it not just for pizza, but also for:
- Garlic knots
- Calzones
- Stromboli
- Breadsticks
- Mini flatbreads
So next time we pass by the freezer aisle, let’s grab a few extra packs. Because when a pizza craving hits — and it always does — we’ll be ready.
Final Thought
Cooking with frozen pizza crust dough doesn’t mean we’re “cheating.” It means we’re being smart — using a shortcut that still gives us that homemade, comforting taste.
With just a bit of patience, some heat, and a dash of creativity, we can turn that frozen dough into something everyone around the table will love.
So the next time we open the freezer and see that lonely dough ball, let’s smile.
Because now we know exactly what to do with it.
Enjoy your meal! 🍕
Can’t wait to hear how yours turned out — drop me a comment below!
Thanks for being here! If you enjoyed the recipe, don’t forget to share it with your friends.
And if you’re still hungry for more, take a look at our earlier recipes — you might just find your next favorite!
Forget Meat! This Vegetarian Alfredo Pizza Is Pure Comfort in Every Bite!
Healthy Pizza That Actually Tastes Amazing: Our Foolproof Homemade Recipe!
Be the first to comment on How to Turn Frozen Pizza Dough into a Pizzeria-Worthy Dinner!